Profile Picture Tip Jars
Linked Tip Jars
Linked tip jars allow you to give another tip jar face to a tip jar. So if you have a room with a worker in it, you can place a tip jar next to the worker, and have another tip jar outside the room displaying the same information as the main tip jar. To start, rez a linked tip jar and rez a main tip jar. Set up the main tip jar as usual except at the end, do not accept debit permissions.
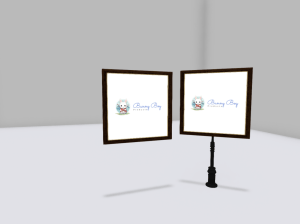
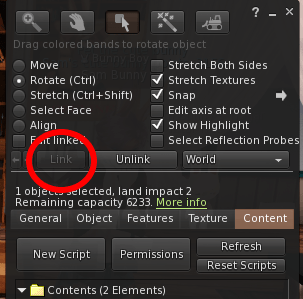
Once you have set up the main tip jar, place the main tip jar and linked tip jar where they are going. Once you link the tip jars they will move as one, so it is a good idea to have them placed before linking them. Once they are placed, right click the linked tip jar and select edit. With the edit window open, move your camera so it can see the main tip jar. While holding down the ctrl button, click the main tip jar. Both tip jars should now be highlighted. On the edit window, click Link. If the link is successful, the link button will now be greyed out.
You can now accept debit permissions. If the debit permissions box has disappeared, click the tip jar and it will pop-up again. Both tip jars should now be displaying the default image you put in the config notecard. The tip jars will act as one. You can log in by clicking either (if using a touch log in tip jar. Sitting will log into both if using a furniture linked tip jar) Both tip jars can accept tips and both will display tip information.
If you accepted debit permissions before linking the tip jars, that is ok. Simply log into the tip jars and log out to sync the tip jar picture.
